My vintage Asahi Takumar 17mm f/4 fisheye lens is one of my favorite staples. I often use it for concert photography:

The great Mock Identity playing Rhizome in DC.

November, 2018. This was the first ever public performance of the band that would be later named Coriky. This wasn’t the first time that Fugazi members Ian MacKaye and Joe Lally were photographed with a Takumar fisheye lens. Back in the day, that was one of the lenses of choice of punk/rop/rap photographer Glenn Friedman, who got his start shooting with Pentax film cameras.

Most of the best concert shots are taken within feet of the band. Here Lyris from T-Rextasy is leaning into me and I love the scale of the bit of her sneaker that is visible.
You may be wondering why I’d want to use an f/4 lens for concert photography when concerts tend to be so darned dark. With other focal lengths, there’s no way I would want an f/4. With a fisheye, I feel like I can get away with a noisier high-ISO photo. I’m trying to capture the overall energy of the moment and I’m not looking for the same type of optical quality that I would want from a 50mm. Fisheyes, or at the very least a very wide lens, are a must for me for concert shooting because I always try to get a shot or two of the band as a whole where all members are in frame.
But there are other quite useful applications for fisheyes! In September, I covered the opening of a new section of the Kennedy Center. I knew I would be shooting a lot of interiors and I knew some might be tight, so I brought the Takumar. While I was interested in using the fisheye’s wide angle to capture smaller interiors, I wasn’t interested in distracting readers with the fisheye look. There’s an easy fix for that when editing photos in Lightroom. You’ve probably used “Enable Profile Corrections” when Lightroom or Photoshop knows and recognizes the lens. In Lightroom, you can also manually select a lens profile and apply it to any photo. The Takumar 17mm isn’t in the Lightroom library, but that doesn’t matter. I simply sampled other lens profiles until I found one that was a good fit. An example of the results:

I pulled out the fisheye to fit the stairs and space into the frame, but a photo like this would seem quite out of place in a news story. So, run the the photo through some Lightroom correction profiles and…
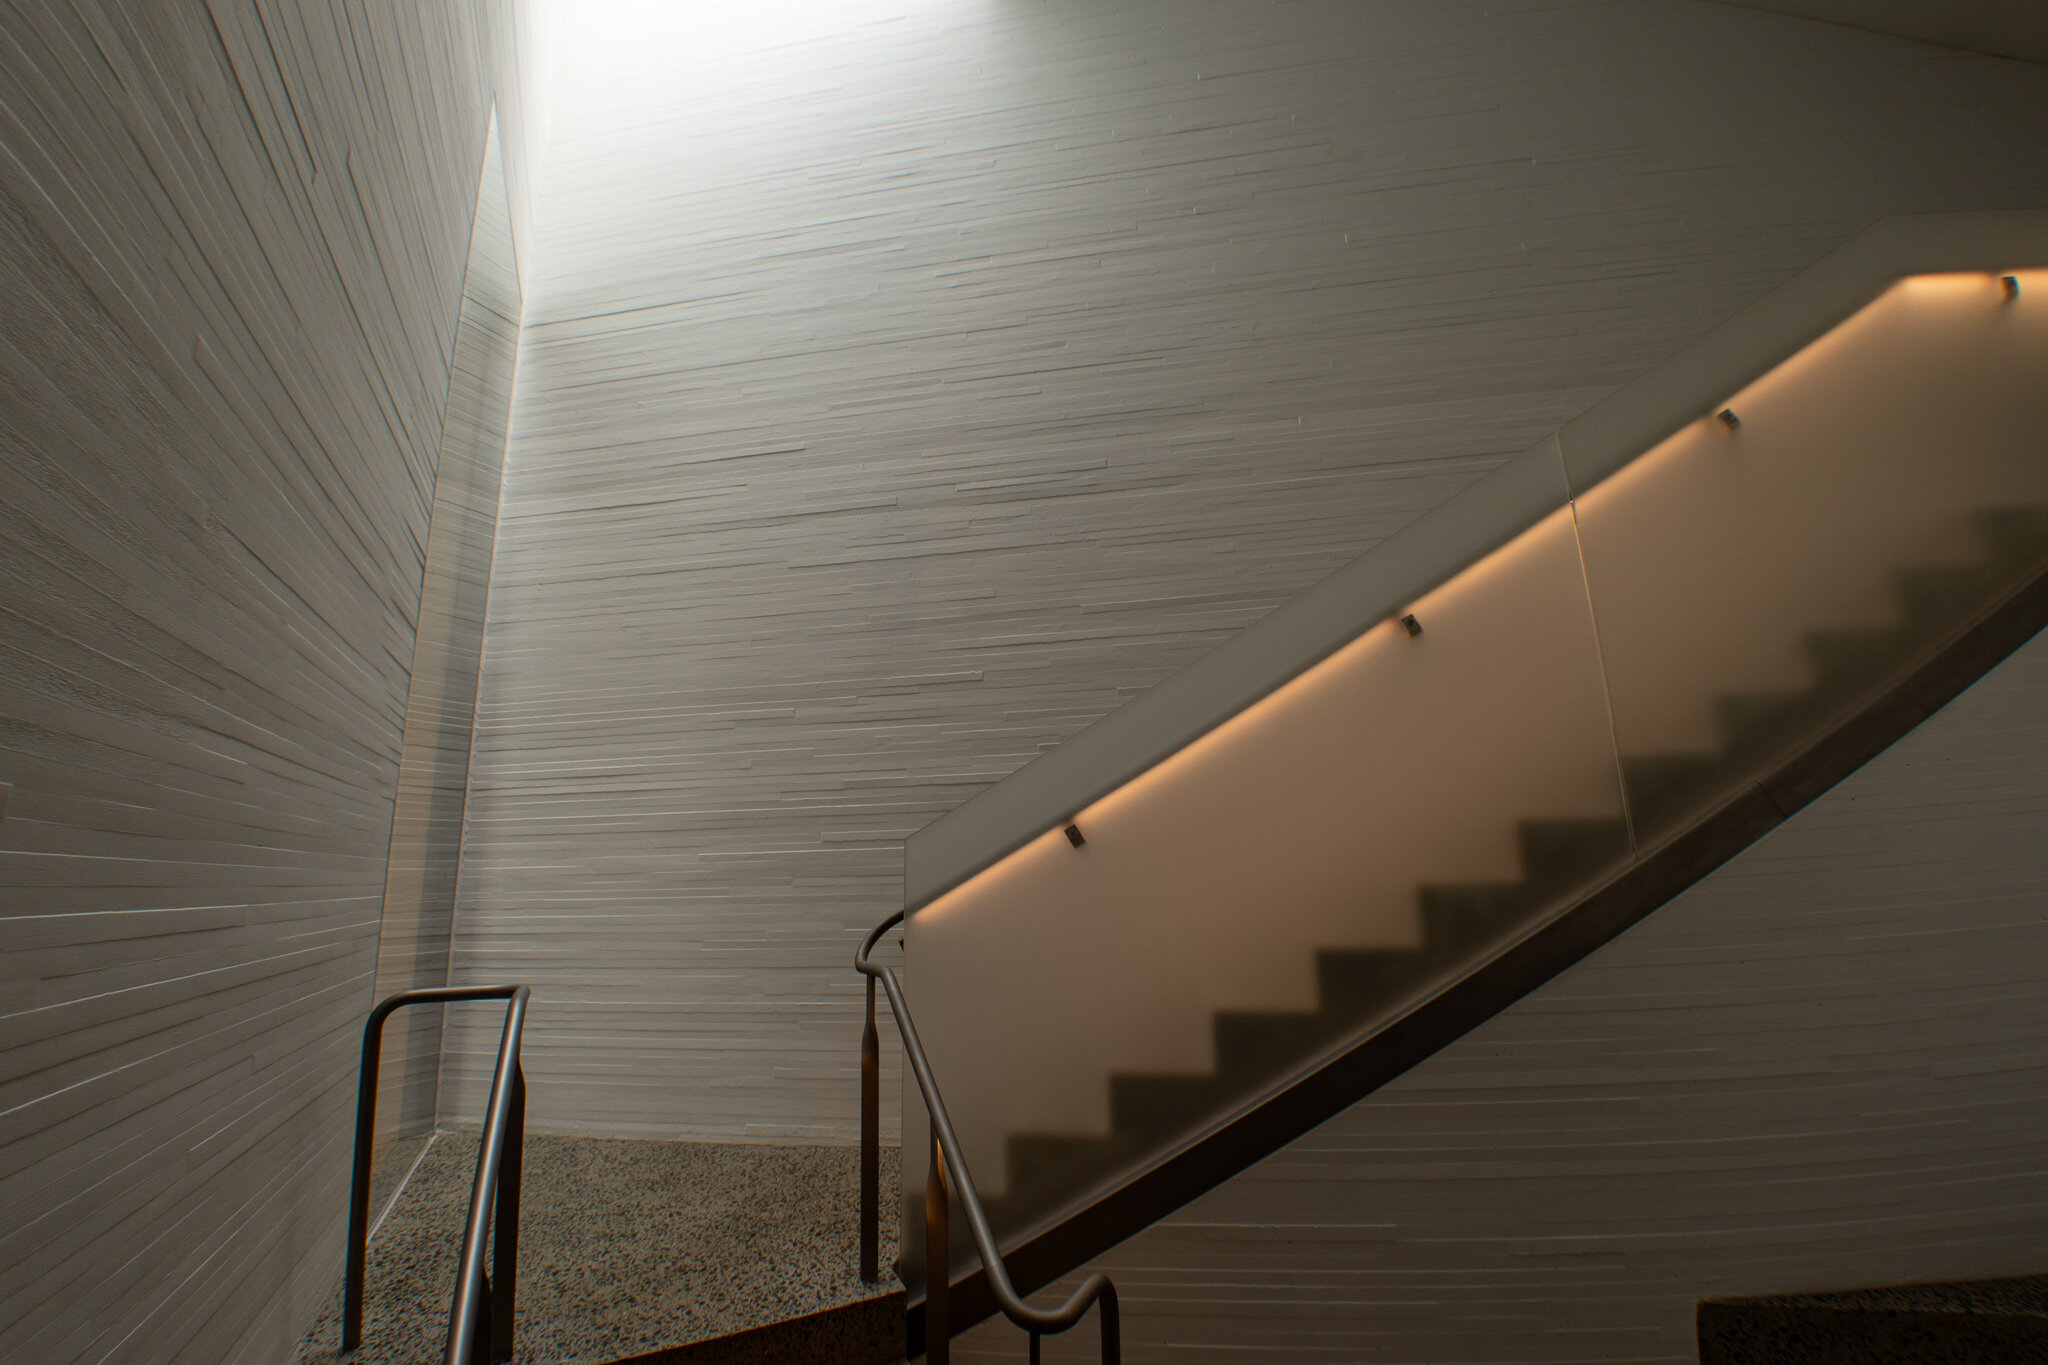
Voila! People will know just what they’re looking at without being weirded out.
It’s not exactly technically complex architectural photography, but it’s an easy way to add flexibility for what types of shot a vintage lens produces. The point is that an old fisheye can give you the perfect aesthetic for things like a band shot, but they can also easily be used to produce more standard looking shots. That’s why I so often keep one in my bag!